Secondary Sequence 2

Continuing from Primary 1, it is also possible for White to divide the right side with 12. Then Black's approach-and extension at 13 is good. Up to 14,Black and White have shared the board peacefully.

Diagram 1
Continuing from Secondary Sequence 2 , Black needs to jump quickly at 1 to secure his territory on the left side.

Diagram 2
After Diagram 1,Black will aim at gouging out White's corner with 1.
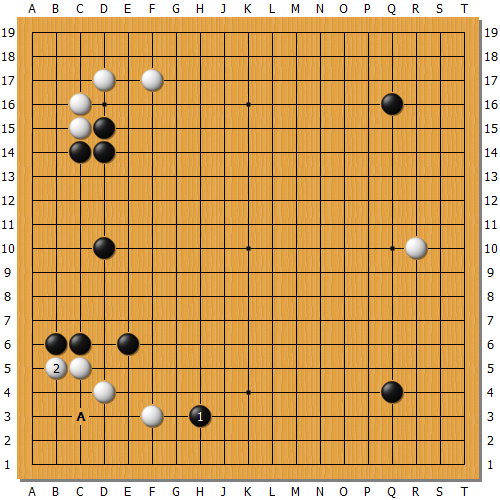
Diagram 3
If Black want to build up his lower-side frame work, he will approach at 1. Black's invasion at A threatens White's basis for life , so White cannot omits 2.

If Black omits the jump in Diagram1,White's intrusion at 1 will be severe. White's counter-bending is god againts Black3.

Diagram 5
Continuing for Diagram 4,it is correct for Black to connect at 2 Up. to 8 , White has restricted both Black's territory and influence.Black's dansoo at A , instead of 7,would be a mistake , leaving potential trouble for black.

Diagram 6
Connecting at 1 instead of white 2 in Diagram 5 would make White's shape heavy.

Diagram 7
It isn't good to cut at 1 because White becomes very strong thanks to the sequence up to 6 .

Diagram8
Black 1 looks plausible. But after White makes Black's shape low and flat with 2 and 4, White's influence is worth much more than Black's territory.
No comments:
Post a Comment